
What is a packaging dieline?
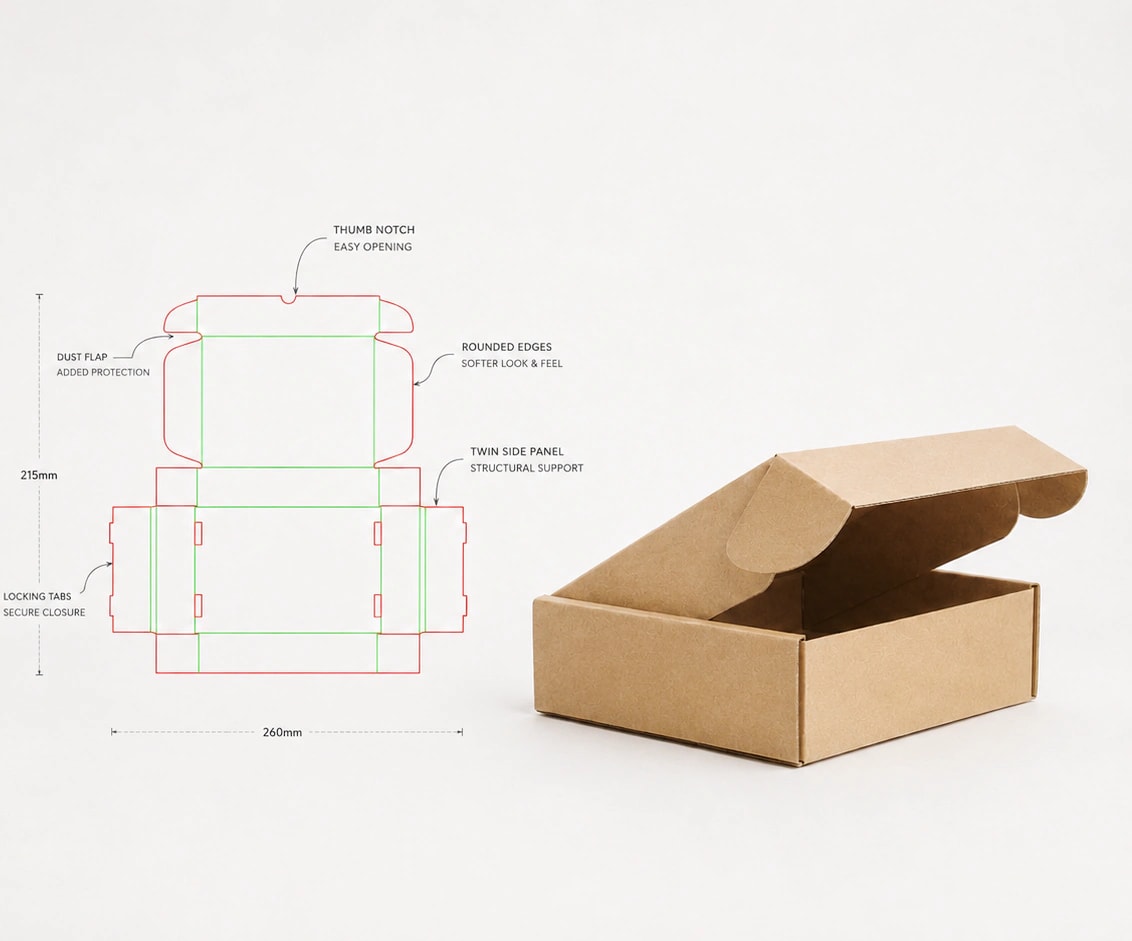
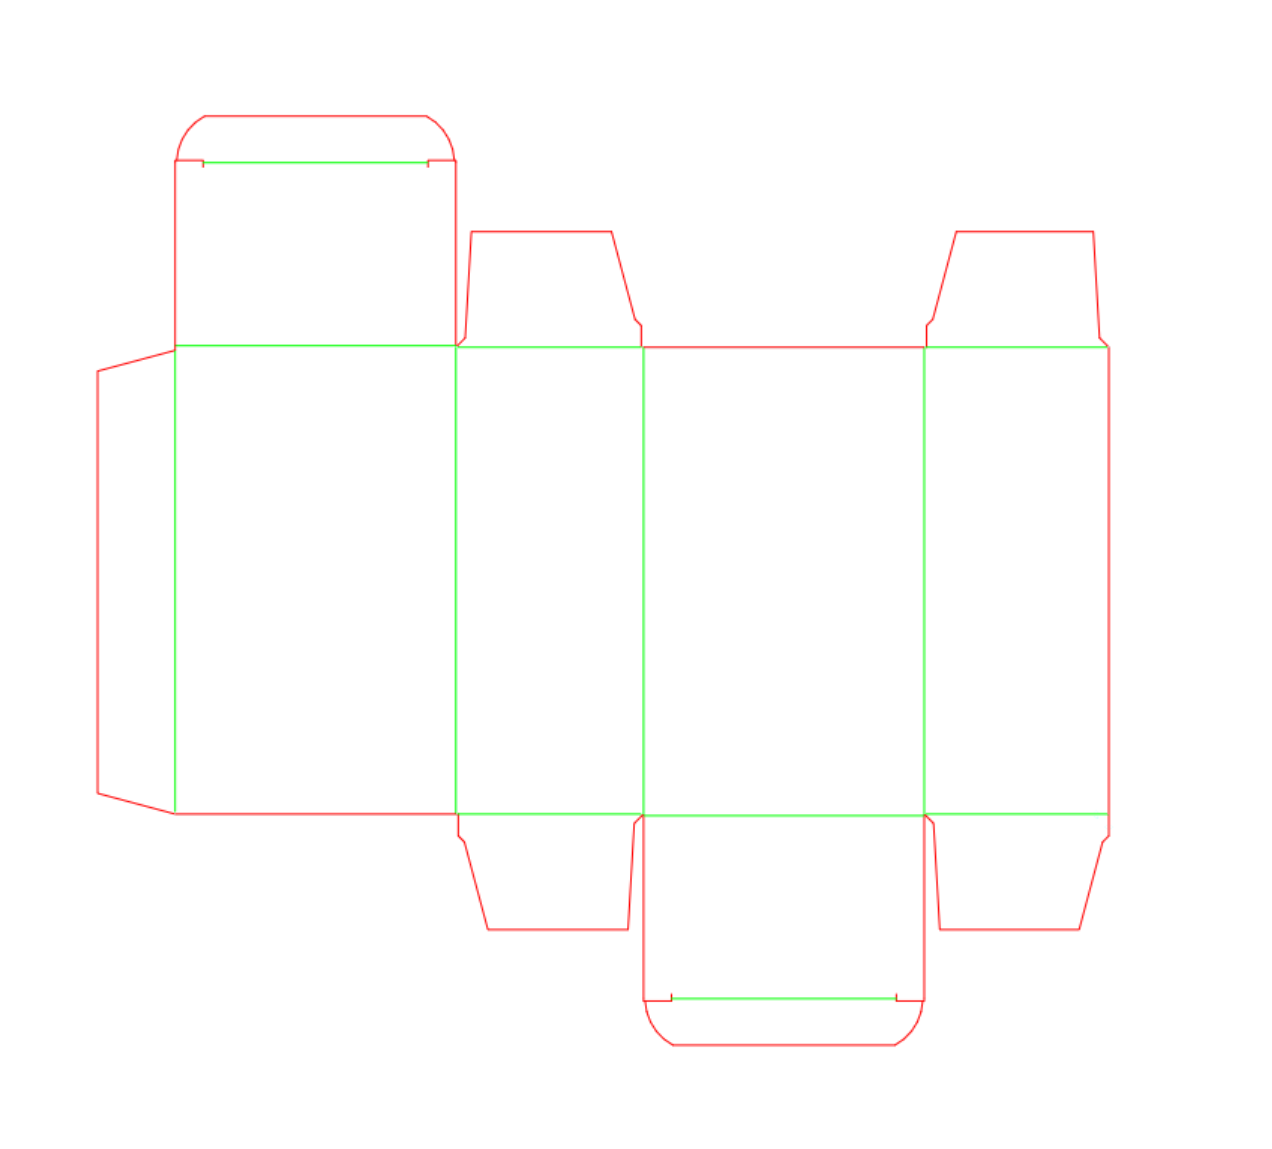
A packaging dieline, also called a keyline, is the flat technical drawing used to create a box or carton. It shows where the packaging will be cut, creased, folded, glued and assembled. Designers use the same file to position artwork accurately before production.
Technical layout
Shows every panel and structural element.
Artwork guide
Helps position graphics, text and barcodes correctly.
Production reference
Guides cutting, creasing, gluing and assembly.
Custom to your packaging
Created around the approved size, material and box style.
One drawing connects design and production
Every line on a Pakko keyline has a purpose. Keeping the structure unchanged allows your designer and our production team to work from the same approved technical file. Select a line type to see where it appears on the drawing.
Show where the board will be cut. Background colours and images should extend beyond these lines into the bleed area.
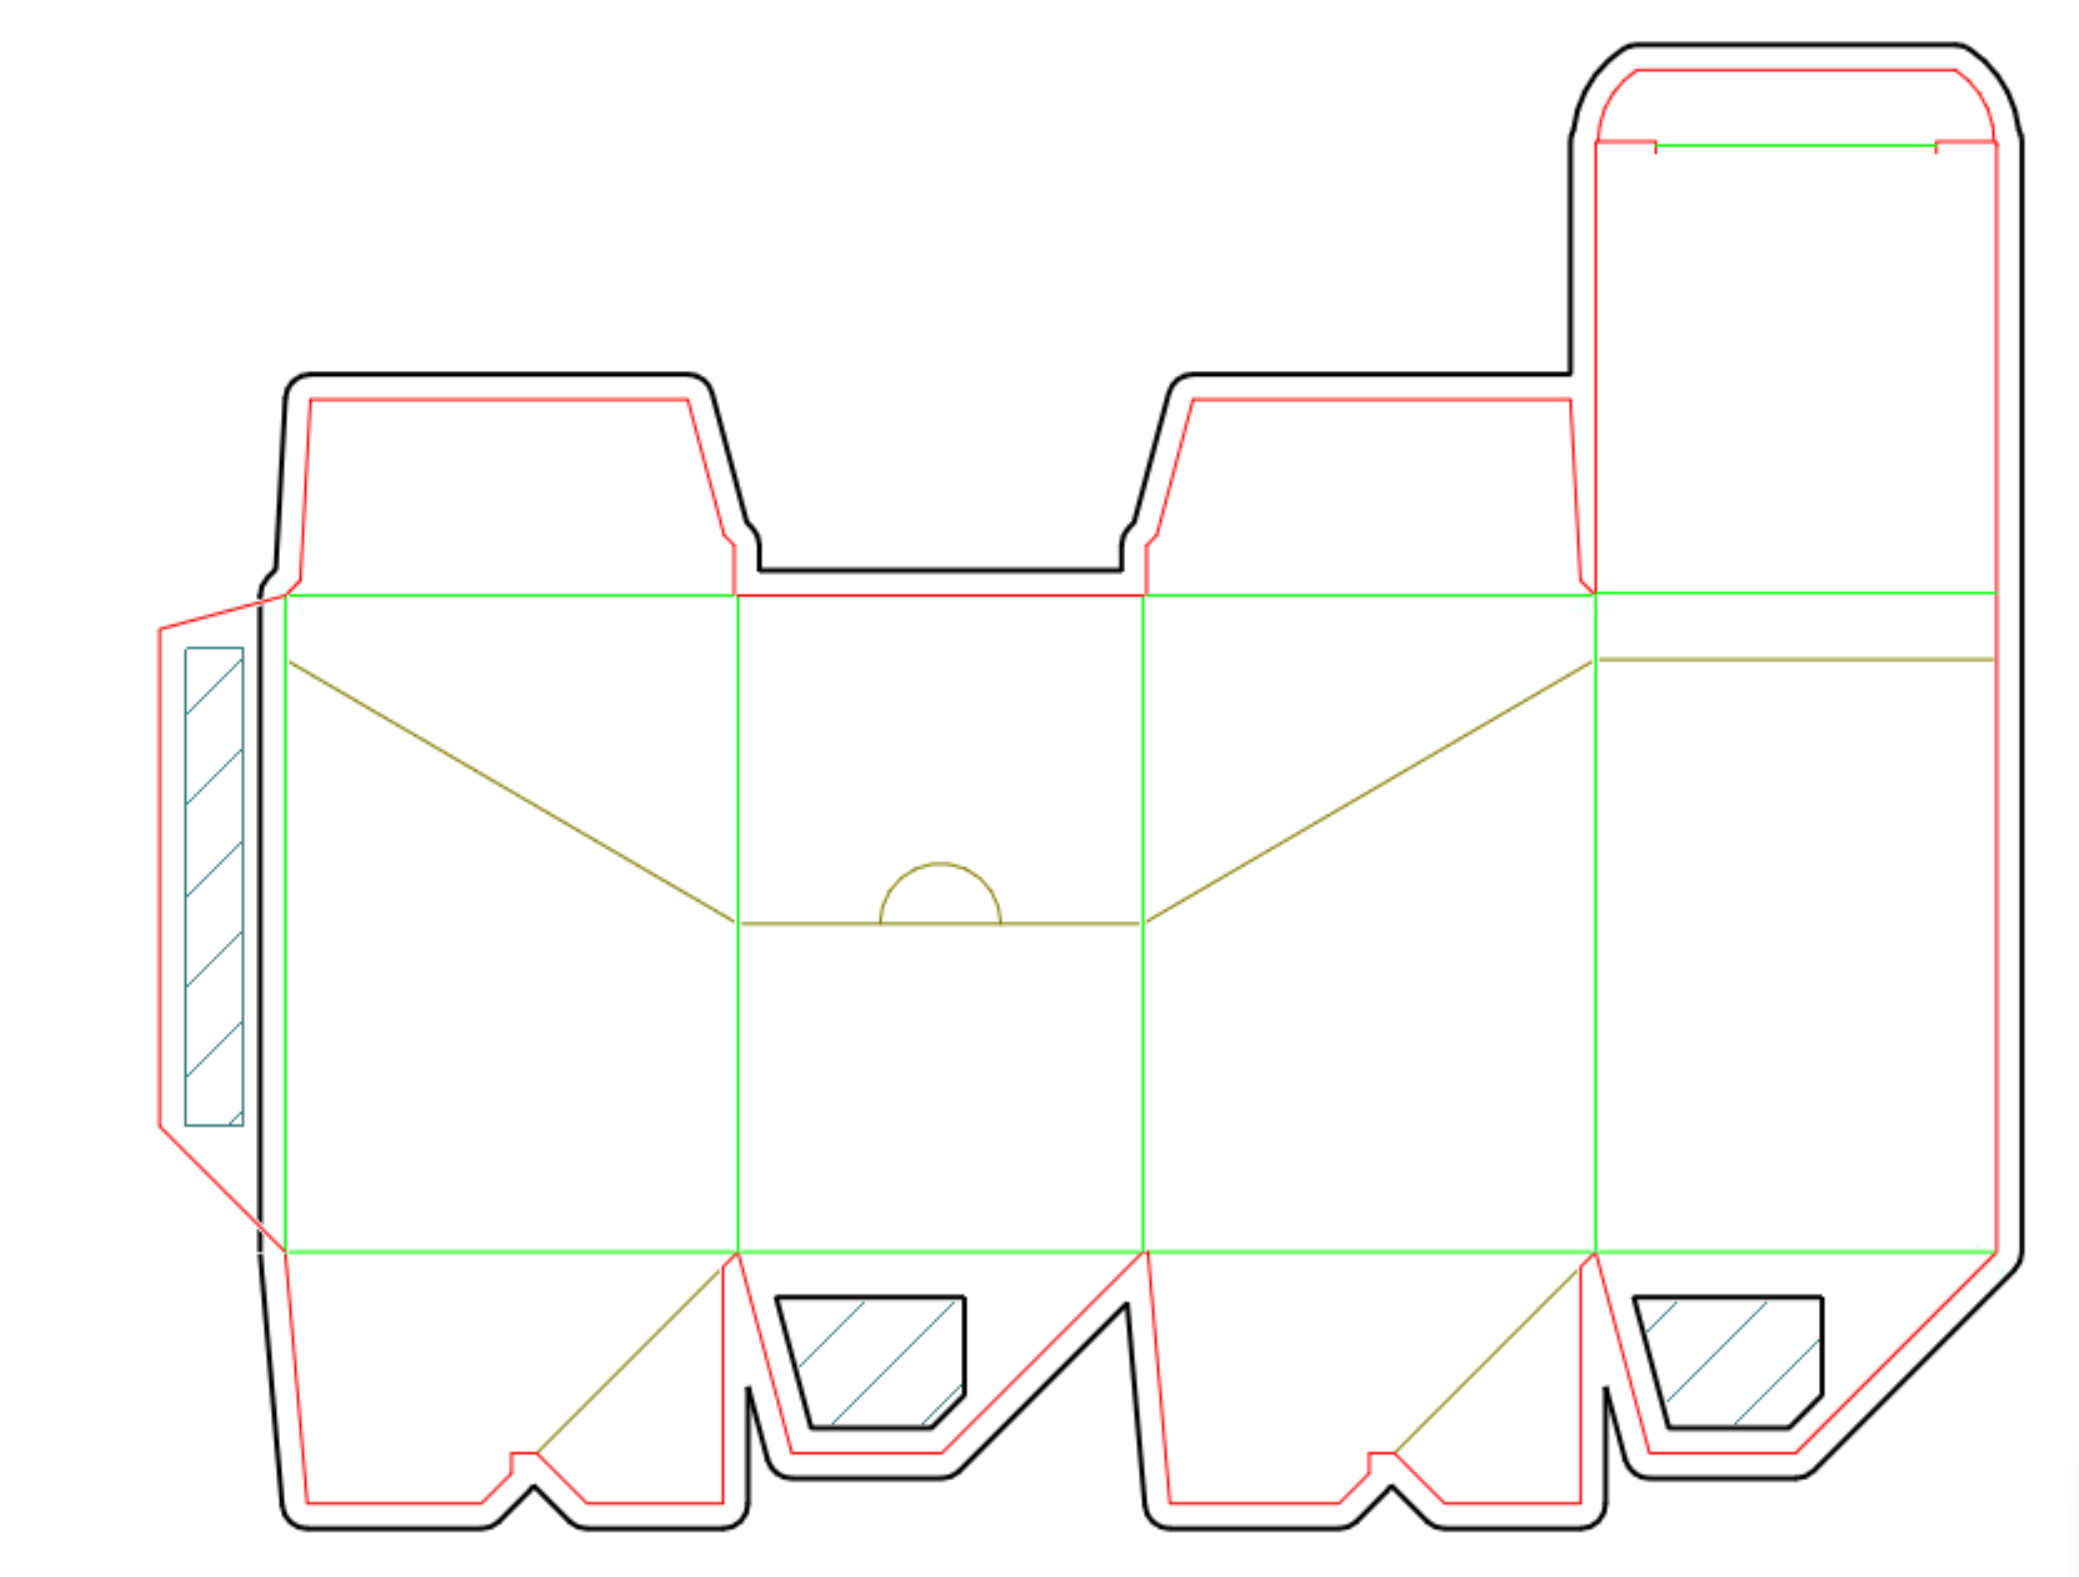
Text alternative: the diagram shows a crash-lock carton keyline. The outer black line is the 3 mm bleed boundary and the red line inside it is the cut line. Green lines are crease or fold lines between each panel. Olive lines are the scores that form the self-locking base. Three hatched areas take glue: the side glue tab on the left edge and the two bottom lock flaps. The dashed inner boundary is the safe zone, set a constant 3 mm inside the cut lines.
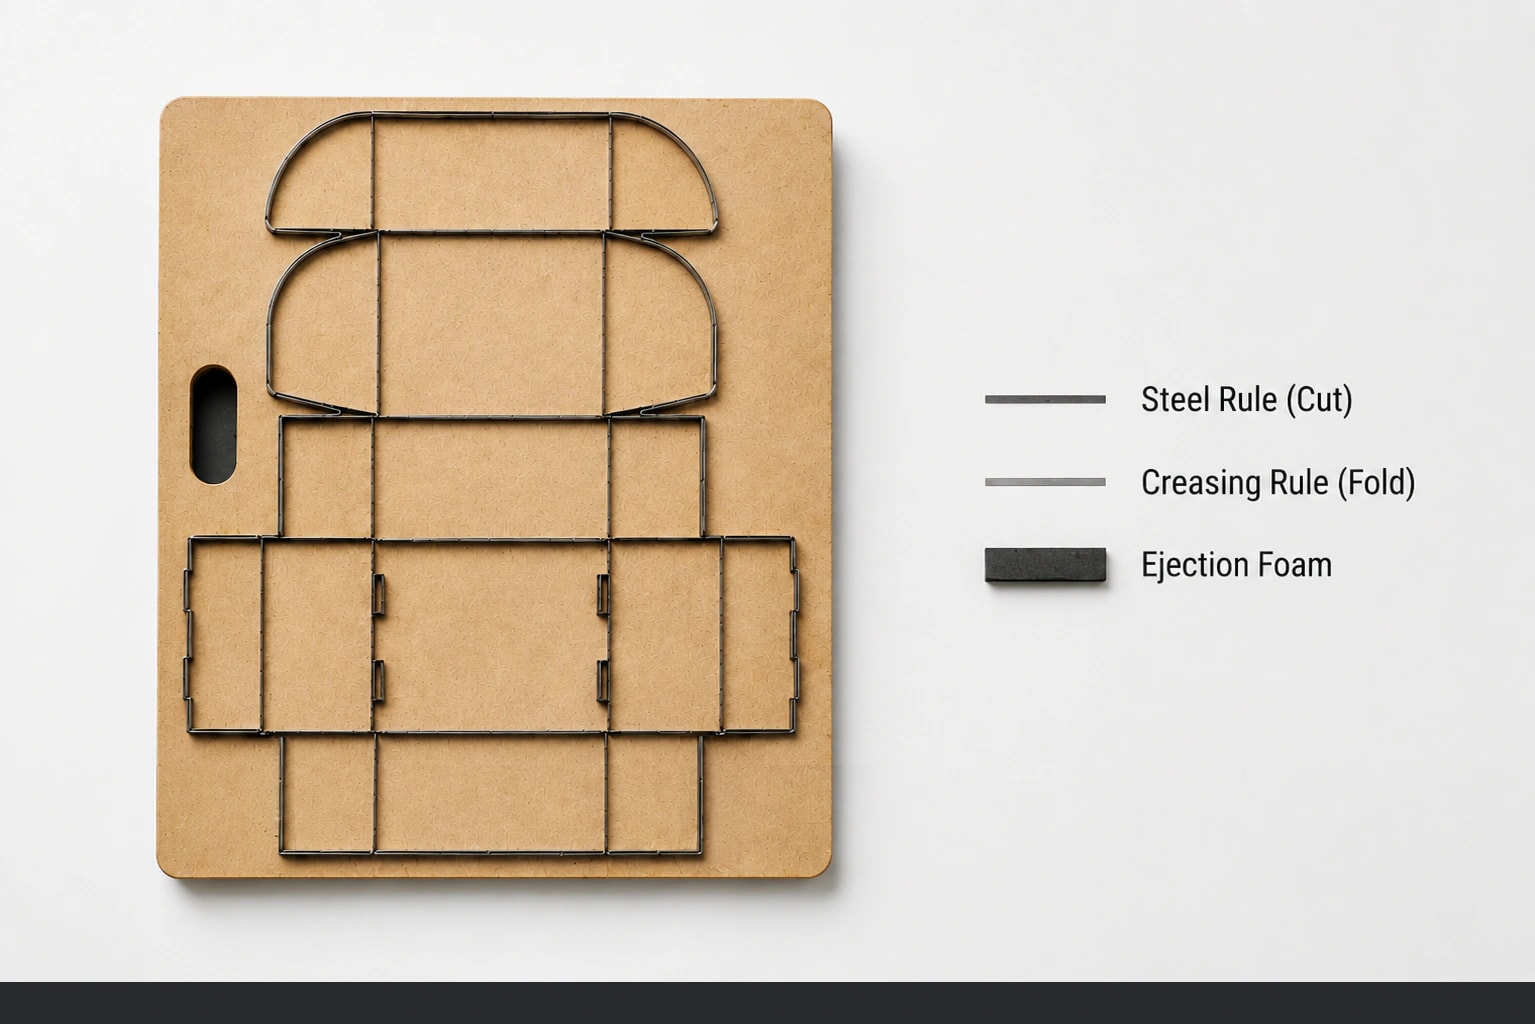
Your keyline becomes a physical cutting forme
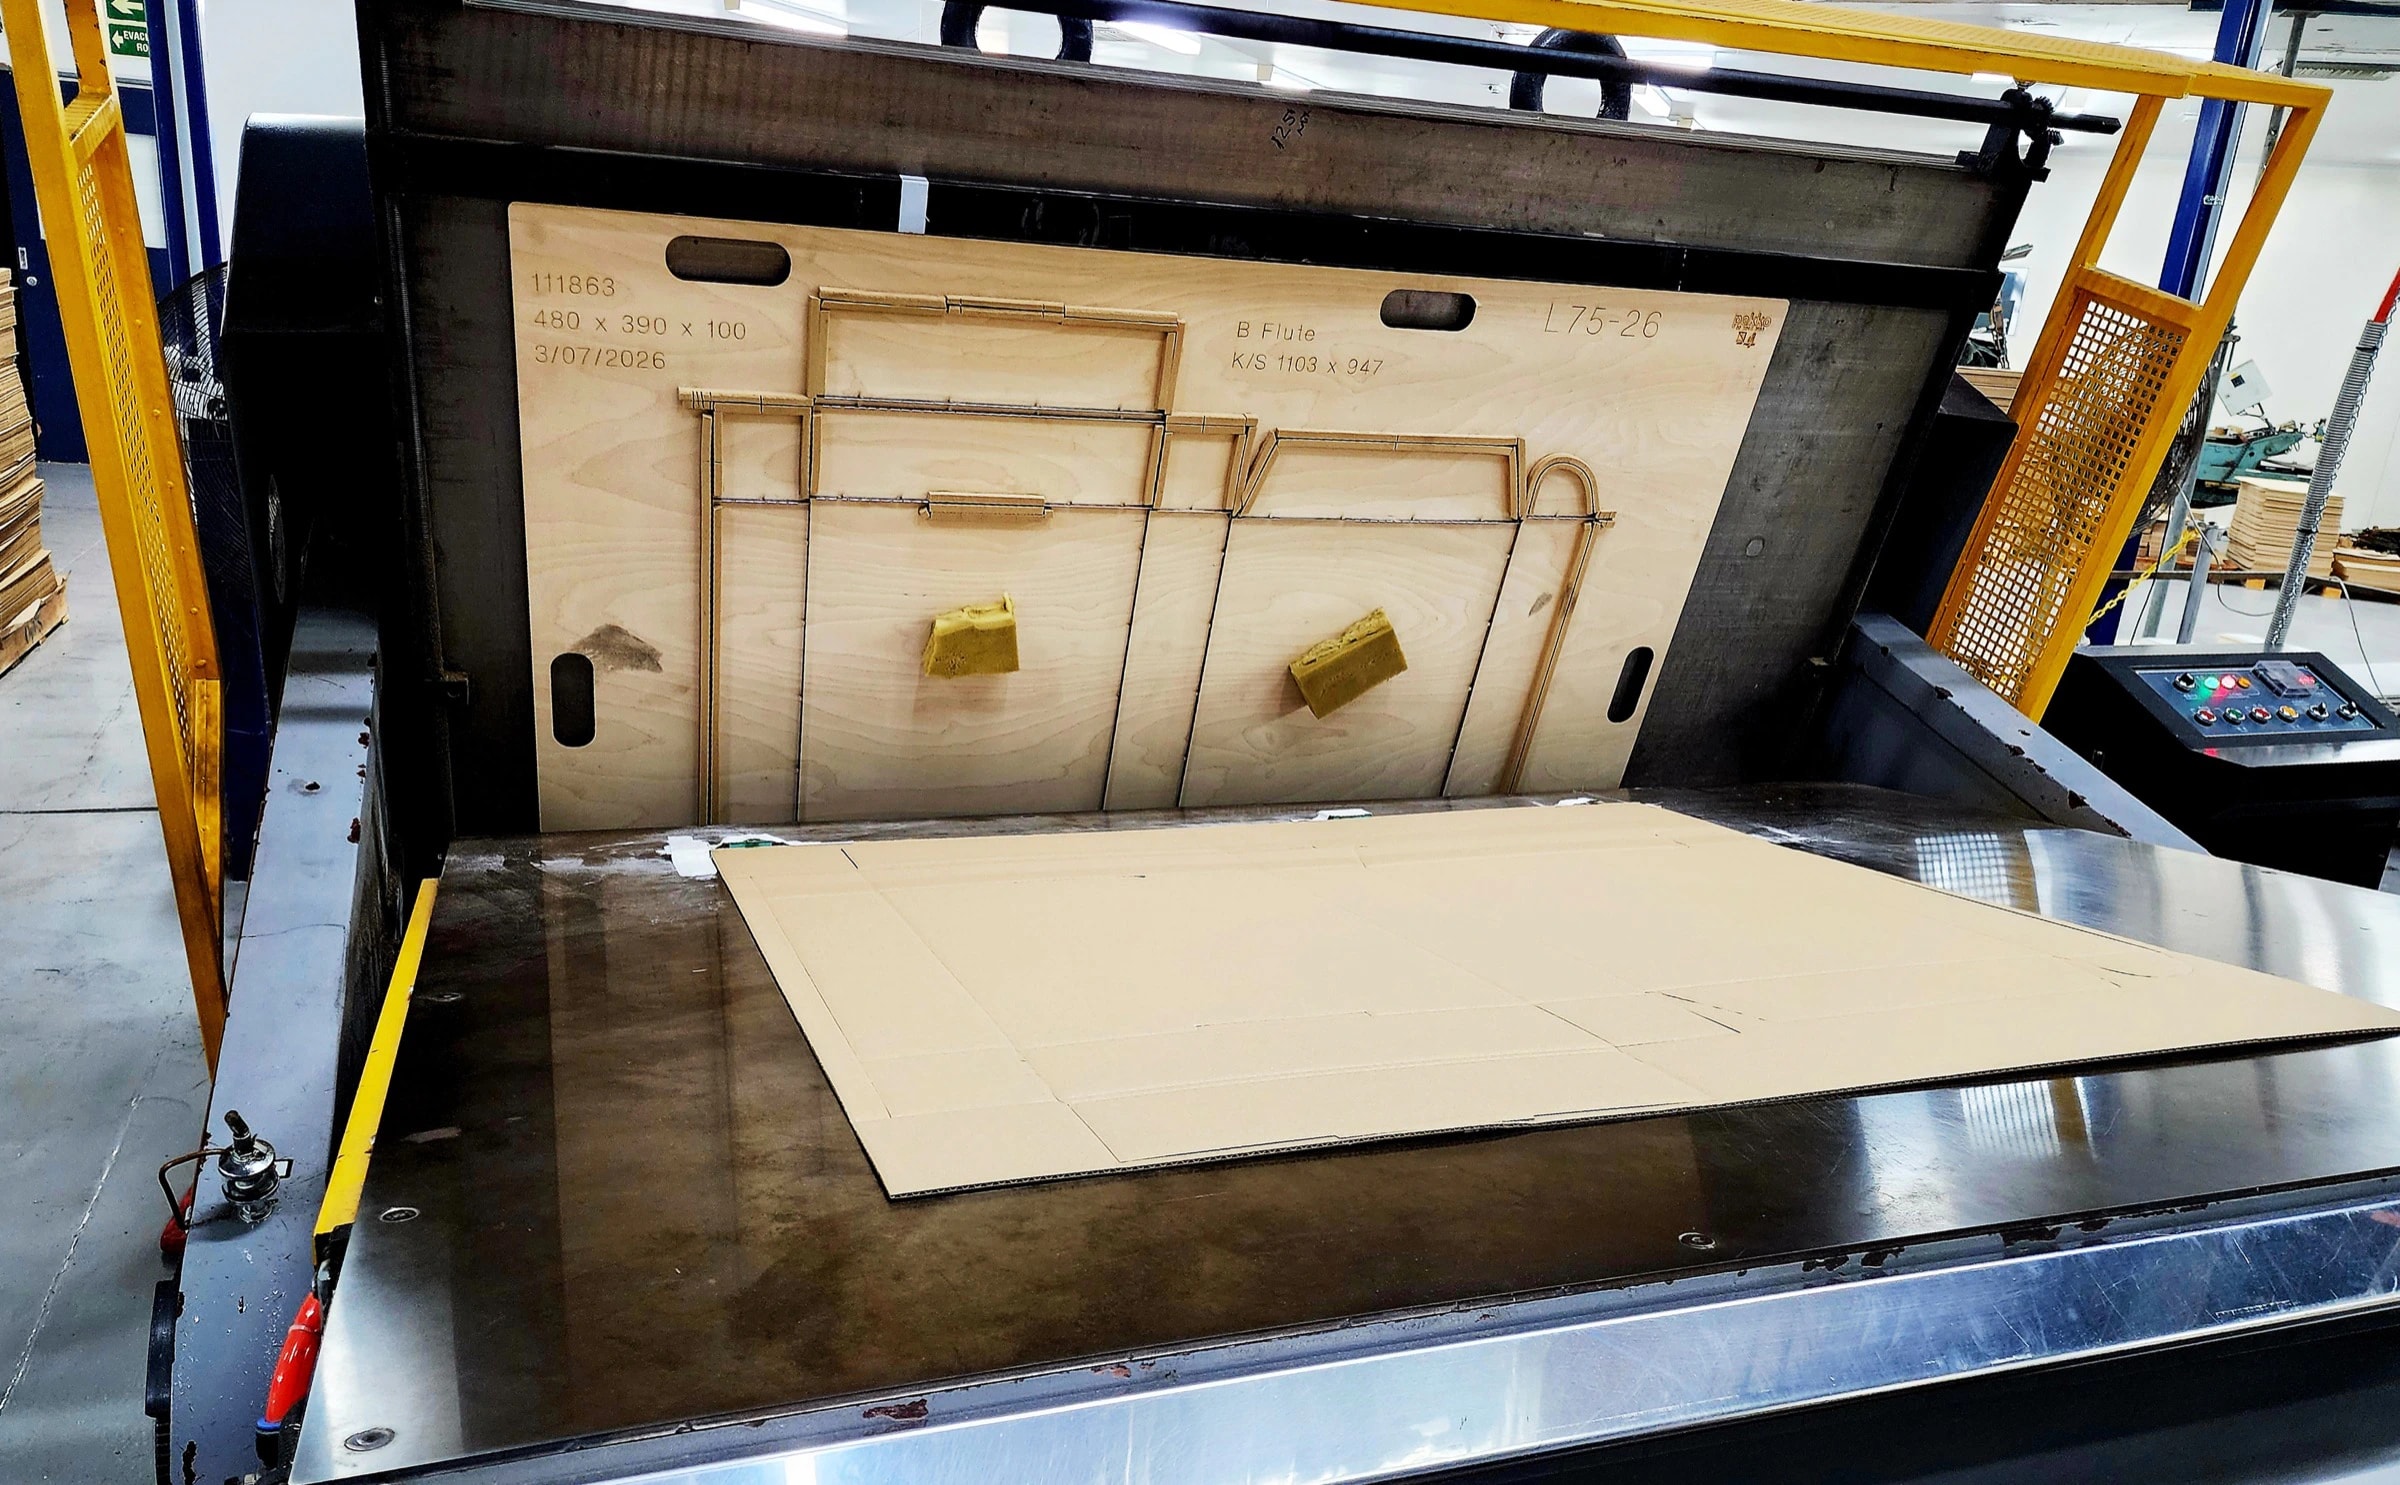
A keyline is a drawing. A cutting forme is the tool made from it. Steel cutting and creasing rule is bent to the exact profile of your approved keyline and set into a plywood base, then mounted in the die cutter to cut and crease every sheet identically.
This is the point at which the structure stops being adjustable. Once the forme is cut, the packaging can only be produced at that size and shape — which is why Pakko confirms the structure and, where useful, a plain sample before tooling is made.
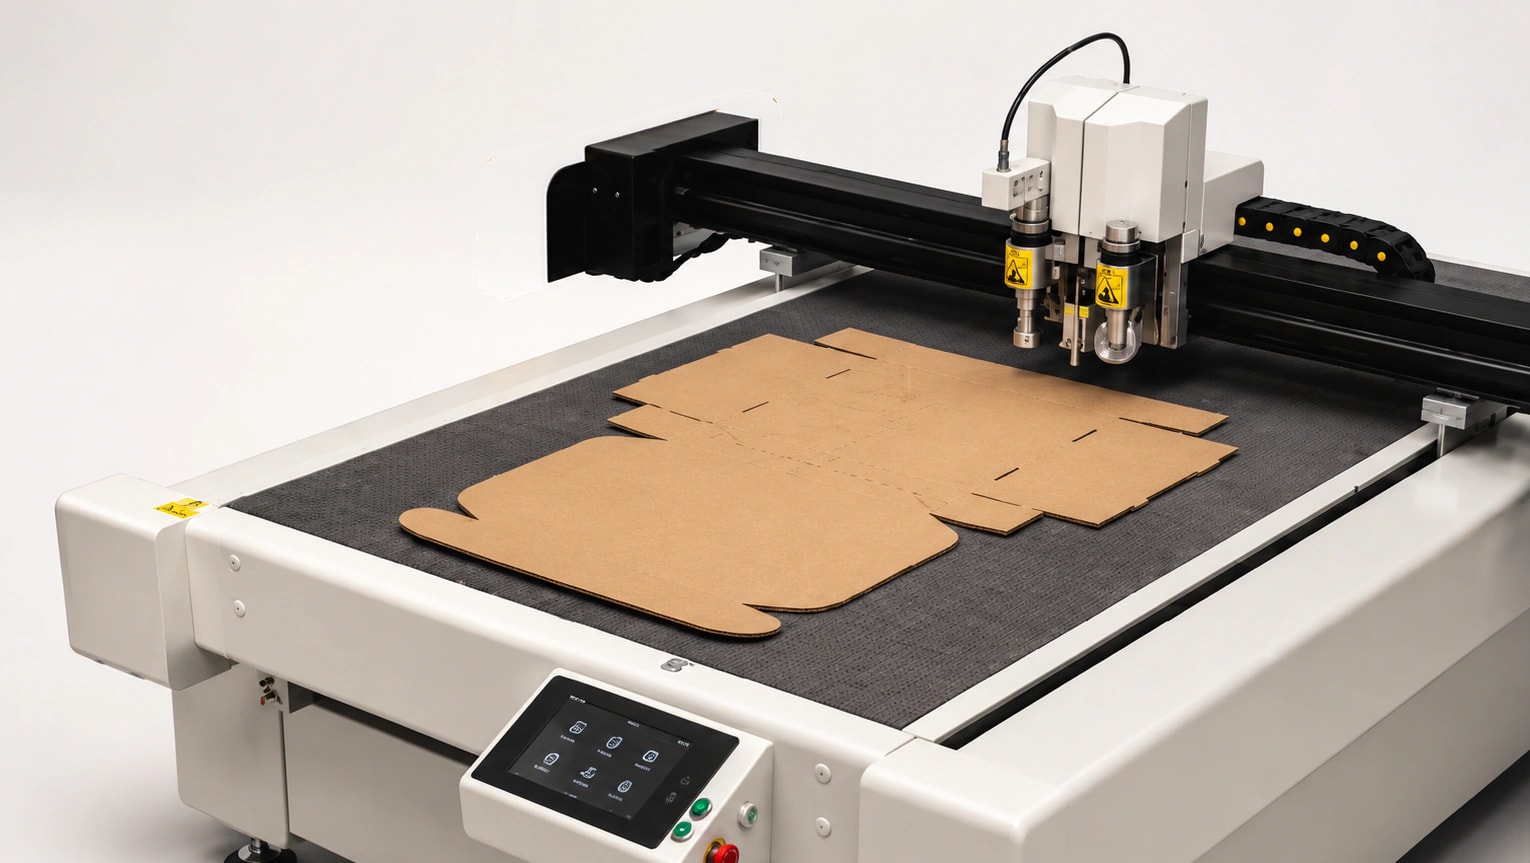
How a keyline becomes tooling
Approved keyline
The flat technical drawing is confirmed — panel sizes, flap positions, glue areas and score placement all locked.
Forme layout
The keyline is stepped and repeated across the press sheet so the cutting forme uses the board efficiently.
Forme manufacture
Steel cutting rule and creasing rule are bent to the profile and set into a laser-cut plywood base.
Make-ready
The forme is mounted in the die cutter and adjusted until cut depth and crease pressure are correct across the sheet.
Production run
Printed sheets are fed through and cut, creased and stripped to the finished blank.
What designers should know about tooling
Tooling is quoted separately
A cutting forme is a physical, one-off tool. It is normally quoted as a separate line item from the printing and converting.
One forme, one structure
A forme cuts exactly the profile it was built for. A change to any dimension usually means new tooling, not an adjustment.
Formes are stored and reused
Once made, the forme is retained for repeat runs — which is why repeat orders of an approved design avoid the tooling cost again.
Existing formes can be assessed
If you own a forme or one sits in our library, we can inspect its condition and confirm it matches your current artwork and sheet layout.
Pakko artwork submission requirements
Pakko uses an editable PDF workflow. We also accept Adobe Illustrator files. Artwork that is not press-ready may require imposition or design support before production can begin.
Work from the supplied keyline
Artwork must be created at the correct size using the final Pakko keyline. Keep the keyline layer unchanged and separate from the printable artwork.
Supply editable files
Submit an editable PDF or Adobe Illustrator file. Flattened screenshots, low-resolution JPEGs and files that cannot be separated into production layers may require rebuilding.
Set artwork to CMYK
Prepare full-colour artwork in CMYK rather than RGB. RGB colours are designed for screens and can change when converted for commercial printing.
Keep total ink under 280%
For CMYK artwork, total ink density should remain below 280% unless Pakko has approved a different production specification.
Use 300 DPI images
Raster images should generally be 300 DPI at their final printed size. Website images and screenshots often become blurred or pixelated when enlarged.
Add at least 3 mm bleed
Extend backgrounds, images and patterns at least 3 mm beyond every cut and die line. Do not finish a background exactly on the cut line.
Keep important content safe
Keep logos, text, barcodes and mandatory information inside the indicated safe zone and away from cuts, creases and perforations.
Embed fonts and linked assets
Embed fonts, images and linked files, or package them with the artwork. Convert fonts to outlines in the final file where appropriate and retain an editable master copy.
Keep glue tabs free of ink
Artwork requiring glue tabs must not include ink, varnish, laminate or special finishes in the glue area unless Pakko has approved it.
Separate front and back artwork
Where front and back artwork are required as separate production files, supply them separately and label them clearly.
Separate special finishes
Foil, emboss, deboss, white ink or spot finishes must be placed on clearly named separate layers using the setup requested by Pakko.
Follow flexographic print requirements
Flexographic artwork has different colour and production limitations. Refer to Pakko’s flexographic artwork guidelines and approved colour chart before finalising the design.
Keep production elements on separate layers
Foil, emboss, deboss, white ink and spot finishes must sit on clearly named layers using the setup requested by Pakko. Keep the keyline layer unchanged and separate from the printable artwork so production can isolate each element.
Flattening everything into a single layer usually means the file has to be rebuilt before production.
Plan colours for the material and print method
Printed colour can change depending on the board surface, board colour, coating and printing method. A colour viewed on screen is not an exact representation of the finished packaging.
CMYK for full colour
Use CMYK values for standard full-colour digital artwork rather than RGB.
Pantone and PMS
Advise Pakko early when a specific Pantone or PMS colour is important. Digital CMYK may provide a close interpretation but cannot reproduce every Pantone colour exactly.
Foil and white ink
Foil colours come from the manufacturer's available range and may not match Pantone exactly. White areas may be created by leaving board unprinted; white ink availability depends on the material and process.
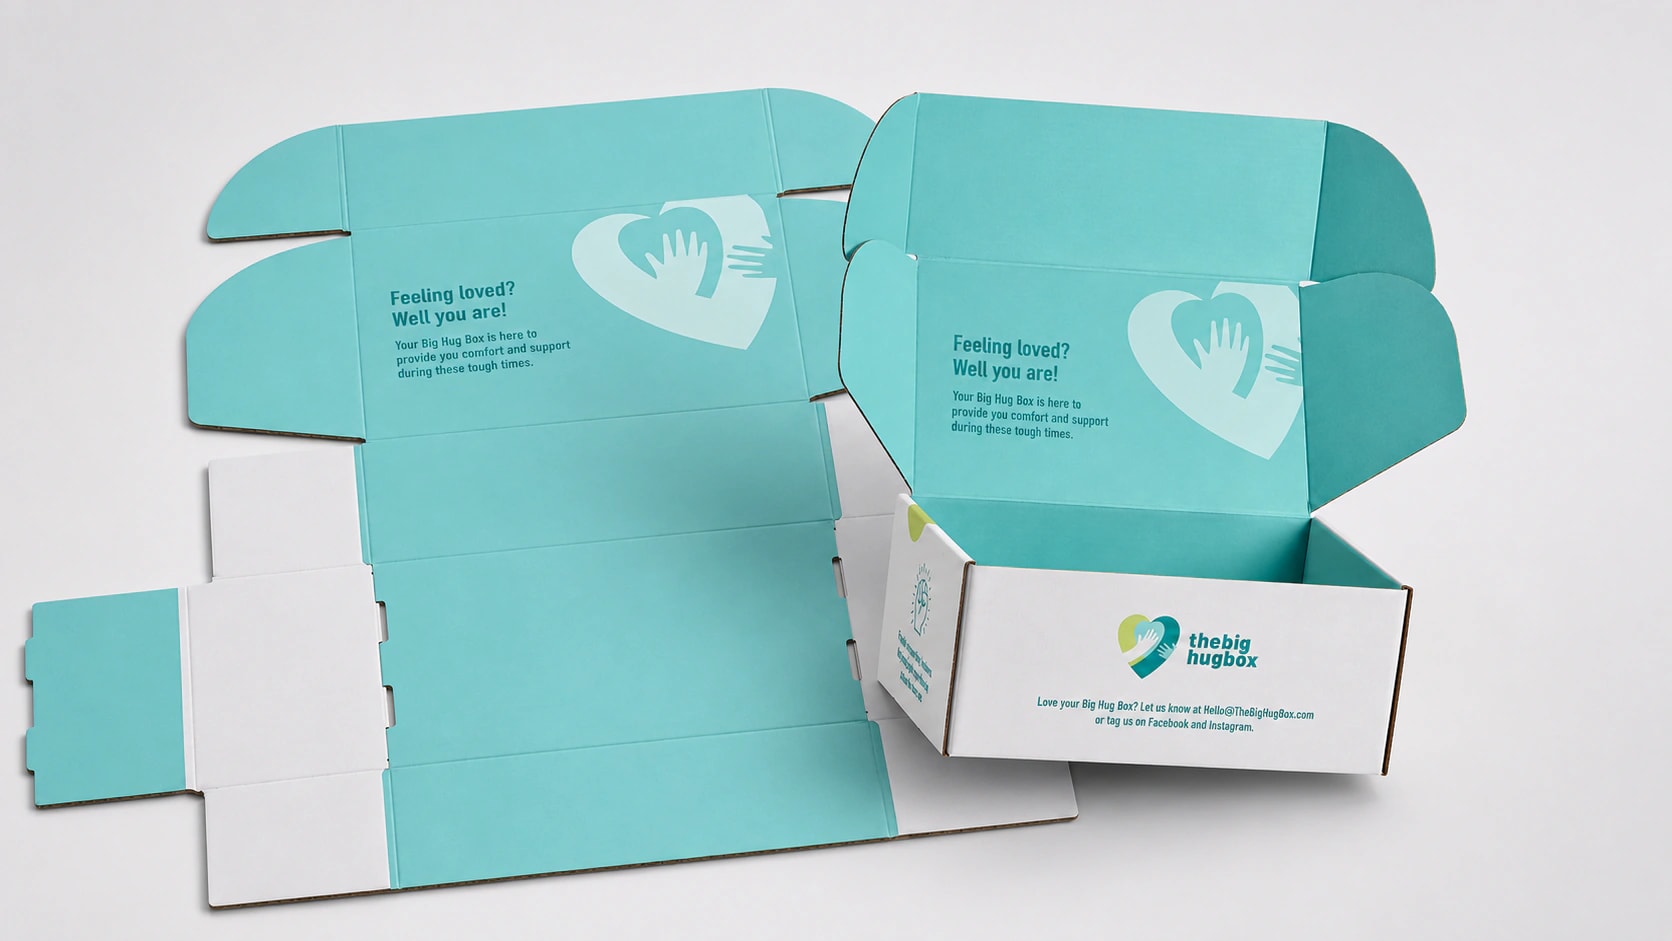
Check how the flat artwork becomes a finished box
Before submitting your file, review which panel is the front, how the lid opens, which panels appear upside down on the flat keyline and how artwork continues around corners. A plain structural sample can help your team understand the box before final artwork approval.
The customer is responsible for proofreading, barcode validity, claims and regulatory content.
Flexo and digital artwork are not prepared the same way
Flexographic printing applies ink directly to corrugated board from a raised plate, so it carries real limits on line weight, type size, colour choice and proximity to scores. Digital and offset printing are far more forgiving. Confirm the intended print method before you begin the artwork — the two are rarely interchangeable once the design is built.
Digital and offset printing
More flexibleFull-colour CMYK
Digital and offset both reproduce full-colour CMYK artwork, including photography, gradients and fine detail.
300 DPI at final size
Raster images should be 300 DPI at their printed size. Vector logos remain preferable where available.
Total ink under 280%
Keep combined CMYK ink density below 280% unless Pakko has approved a different specification.
3 mm bleed
Extend backgrounds at least 3 mm past every cut and die line, the same as all other Pakko artwork.
Small type is fine
Digital and offset hold fine type and hairlines that flexo cannot. Standard safe-zone rules still apply near folds.
Pantone by approximation
CMYK can approximate most Pantone colours closely but not exactly. Advise Pakko early when a specific match is critical.
Litho laminating for corrugated
High-quality offset sheets can be laminated to corrugated board where flexo print quality is not sufficient.
Finishing available
Foiling, embossing, celloglazing and spot finishes are available on digital and offset work, supplied on separate named layers.
Flexographic printing
Strict rules3 mm trapping
Allow 3 mm trapping between adjoining colours. Flexo plates shift slightly on press, and trapping prevents white gaps appearing at the join.
10 mm from all scores
Keep type, logos and solid edges at least 10 mm away from every score line. Printing across a score produces a broken, rough result.
1 pt minimum line weight
Fine lines below 1 pt tend to break up or disappear on corrugated board. Reverse-out lines need 2 pt to hold cleanly.
4 mm minimum text height
Set text no smaller than 4 mm high. Small type fills in on the fluted surface and becomes unreadable.
Do not print over fold lines
Artwork crossing a fold line may result in a rough edge. Break the design at the fold rather than running through it.
Approved colours only
Flexo runs from a fixed set of approved board colours. Select from the charts below rather than specifying an arbitrary Pantone.
Solid coverage, not gradients
Flexo suits solid spot colours and simple line work. Gradients, fine screens, photographs and drop shadows are unsuitable.
Vector artwork required
Supply vector line work with fonts outlined. Raster logos and placed images will not reproduce reliably at flexo resolution.
What the flexo rules look like
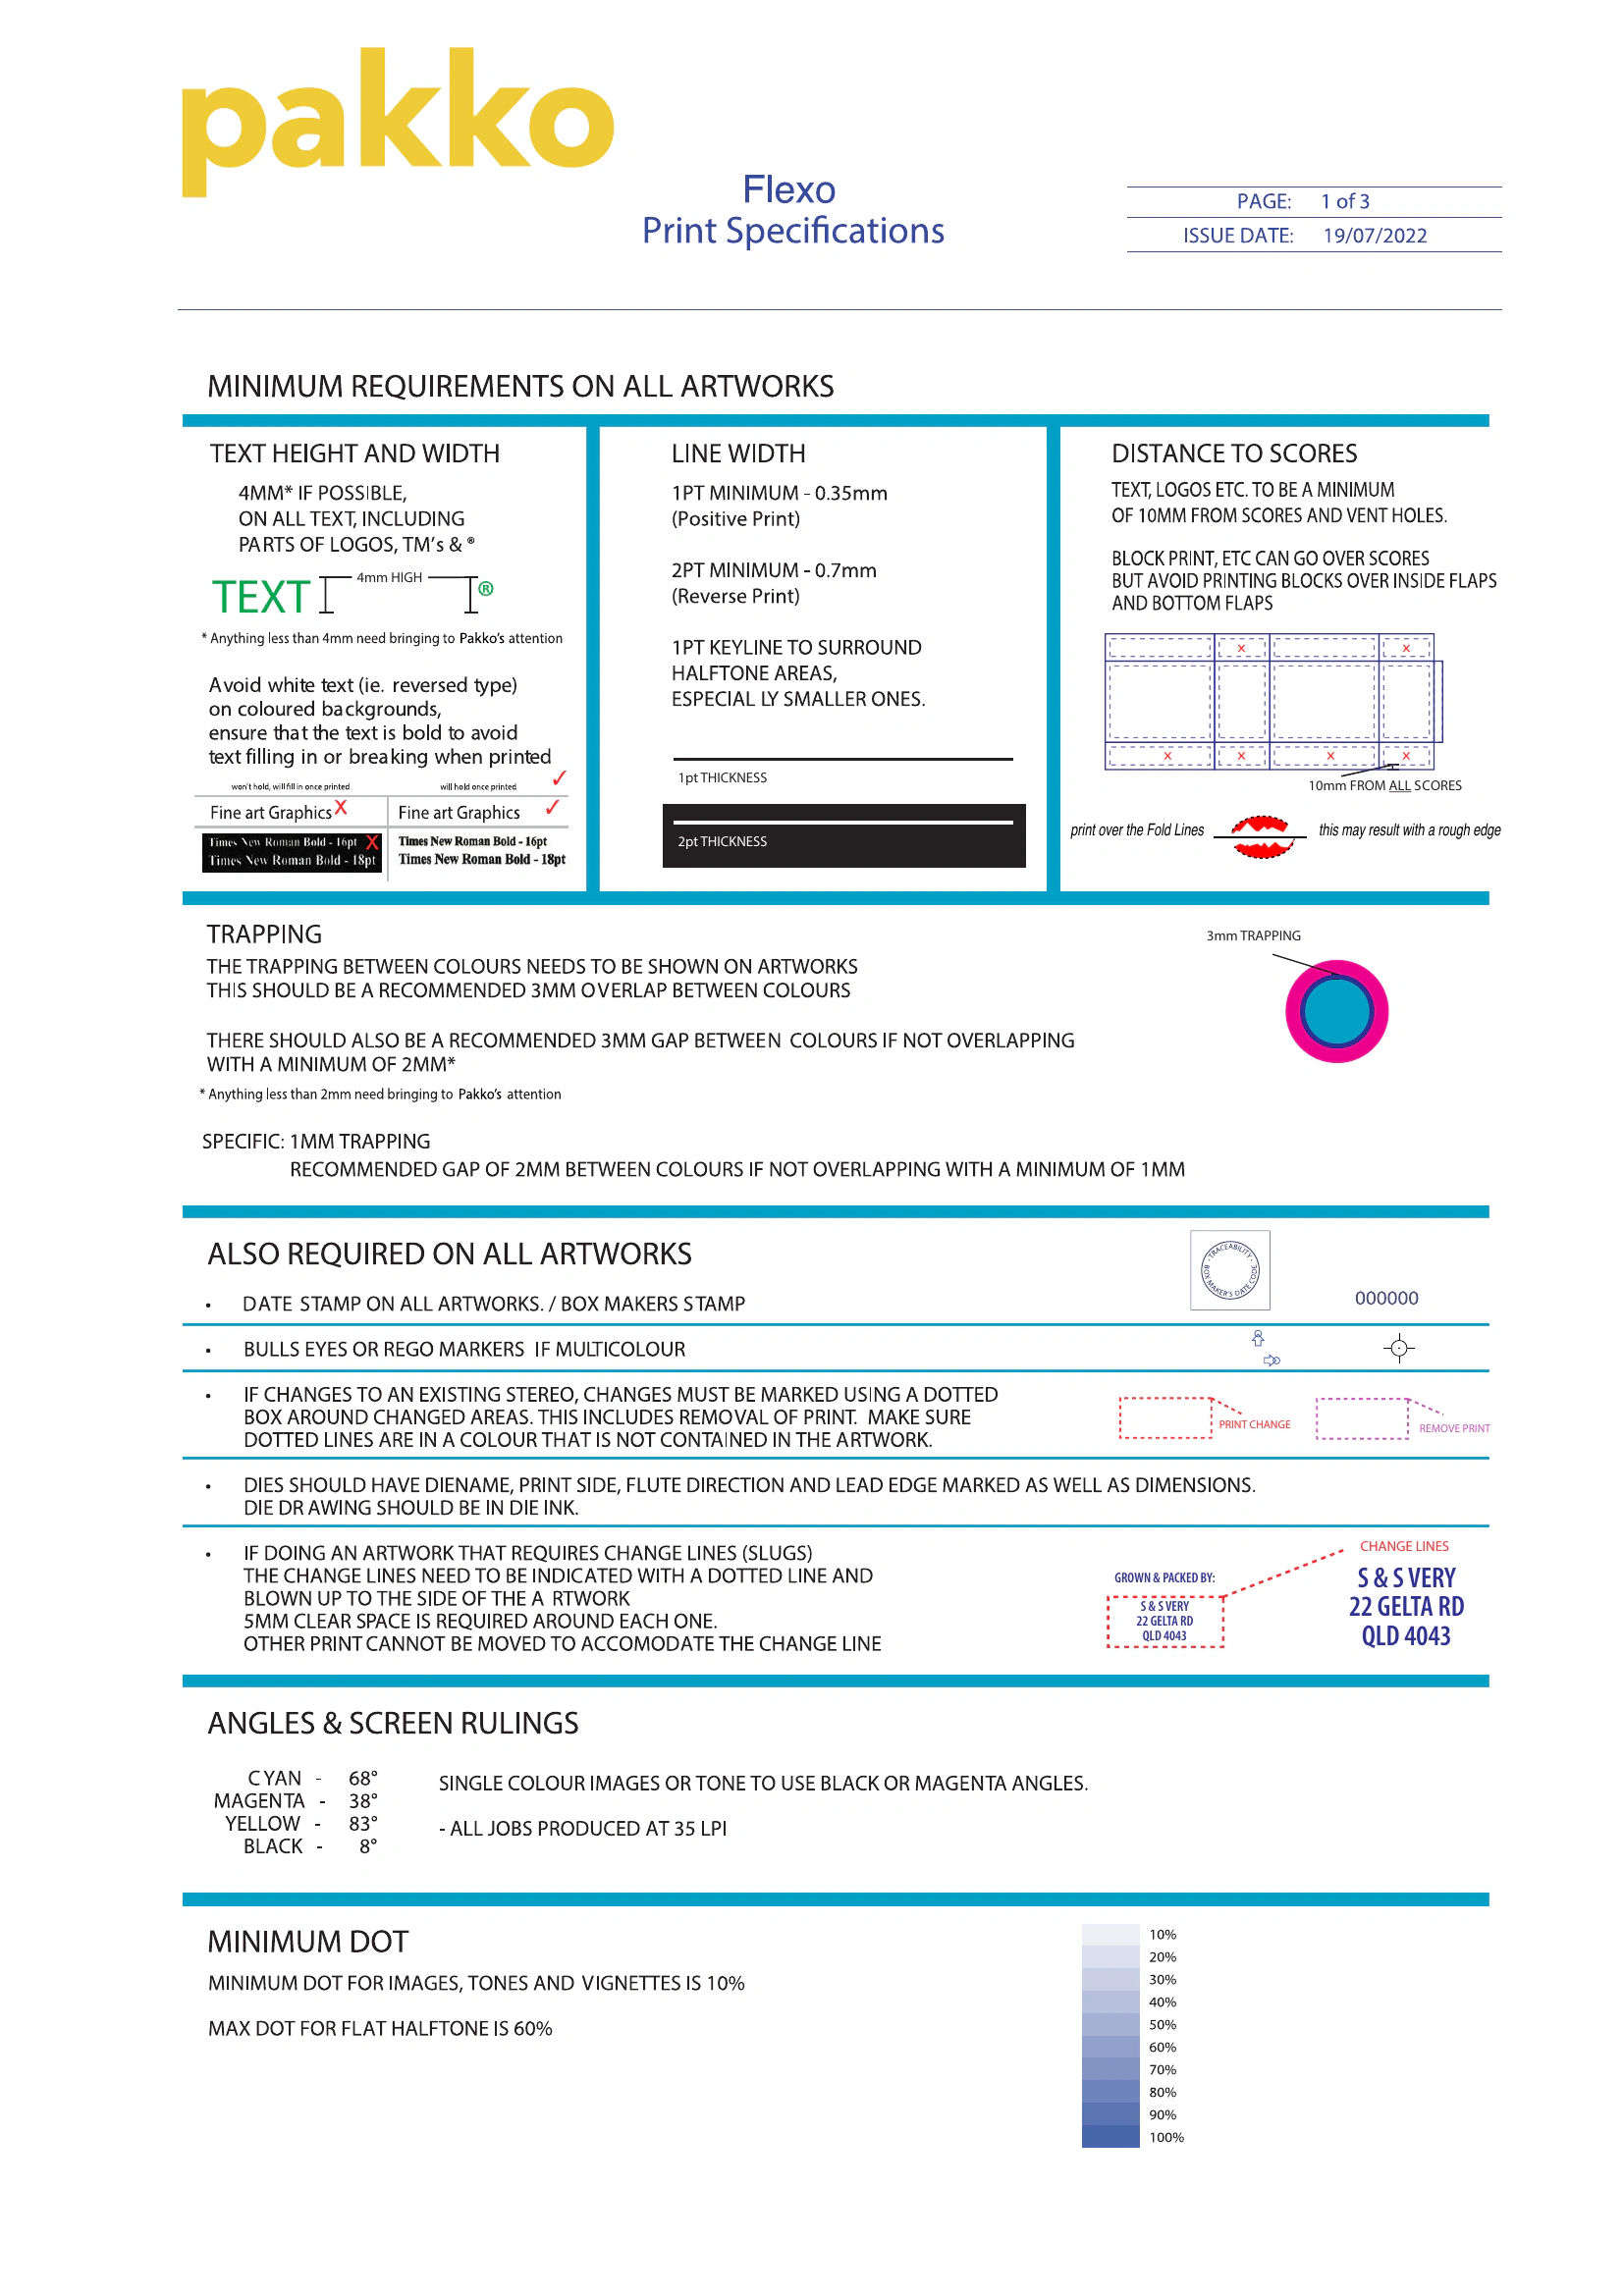
Each requirement shown against the setup it prevents. Diagrams are indicative — refer to the downloadable requirements sheet for the measured originals.
3 mm trapping
Two colours overlap by 3 mm so no white gap appears if the plate shifts on press.
10 mm from all scores
Keep type and solid edges 10 mm clear of every score, or the print breaks along the crease.
Line weight: 1 pt / 2 pt
Positive lines need 1 pt minimum. Reverse-out lines need 2 pt to hold on board.
4 mm minimum text height
Below 4 mm, type fills in on the fluted surface and stops being legible.
Never print over fold lines
Artwork carried across a fold produces a rough, broken edge. Break the design at the crease.
Solid colour, not gradients
Flexo holds flat spot colour and line work. Gradients, fine screens and photographs will not reproduce.
Pakko flexo artwork requirements sheet
Two pages of annotated diagrams covering trapping, score clearance, line weights, minimum text height and fold lines, plus the full approved brown and white board colour charts. Send this to your designer before artwork begins.
PDF · 2 pages
Approved flexo board colours
Flexo artwork must specify colours from the approved charts below. Available colours differ between brown and white board, so confirm the board before selecting. Swatches shown on screen are indicative only — request a printed reference when colour is critical.
Approved brown board colours
Approved white board colours
Artwork issues that can delay production
Designing before the structure is approved
Confirm the packaging size and style before building final artwork.
Moving or resizing the keyline
Keep the keyline at its original size and scale.
Missing bleed
Extend all full-bleed artwork beyond the cut line.
Text too close to a fold
Move important text and logos into the safe area.
RGB artwork
Convert the document and placed images to CMYK before submission.
Low-resolution images
Supply original vector logos and high-resolution images.
Missing fonts or links
Outline or embed fonts and include every linked asset.
Flattening all production layers
Keep artwork, keyline and special finishes clearly separated.
Printing the keyline
The technical keyline must not appear as part of the finished artwork.
Recommended artwork file formats
Adobe Illustrator is generally the preferred program for packaging artwork because it supports vector graphics, editable keylines, layers and spot colours.
Your packaging artwork process with Pakko
Confirm the packaging requirements
Provide product dimensions, quantity, intended use, preferred box style, print requirements and delivery needs.
Approve the structure
Pakko confirms the packaging structure and prepares the required keyline. A plain structural sample may be recommended.
Apply your artwork
Your designer applies the design to the approved Pakko keyline.
Submit your files
Send the editable artwork and all required images, fonts and finishing layers.
Prepress review
Pakko checks common production issues such as bleed, image resolution, keyline placement and file setup.
Review the digital proof
Check every panel, orientation, colour instruction and finishing note carefully.
Approve production
Production begins after artwork, structural and commercial approvals are complete.
Not a designer? No worries.
Pakko can support customers at different stages of artwork preparation.
Prepress
Imposed artwork must be supplied by the client following Pakko's press-ready guidelines.
Submit Your ArtworkImposition Only
Artwork and content must be supplied by the client.
Request ImpositionArtwork Design
All written content, logos, images and required information must be supplied by the client.
Request Artwork DesignStructural Design
Physical products are usually required so fit and performance can be tested accurately.
Request Structural DesignPakko's prepress review checks common production issues. The customer remains responsible for proofreading, content accuracy, barcode validity, claims, regulatory requirements and final artwork approval.
Packaging dieline and artwork FAQs
Do I need a keyline before designing my packaging?▾
Yes. Final artwork should be created on the approved Pakko keyline. Designing before the structure is confirmed can result in the artwork needing to be rebuilt.
Can Pakko create a custom box dieline?▾
Yes. Pakko can create a keyline based on the approved packaging dimensions, box style, material and production requirements.
Can I use a generic box template downloaded online?▾
A generic template may help with early concepts, but final production artwork must use the keyline supplied or approved by Pakko.
Can I create packaging artwork in Canva?▾
Canva may be useful for a visual concept, but it does not always provide the editable layers, vector paths, bleed and spot-colour setup required for packaging production. Pakko can review your available files and advise what is needed.
How much bleed should packaging artwork have?▾
Pakko requires at least 3 mm bleed on all cuts and die lines unless a different requirement is specified for the project.
Should artwork be RGB or CMYK?▾
Commercial full-colour packaging artwork should be prepared in CMYK. RGB is designed for screens and may change when converted for printing.
What resolution should images be?▾
Raster images should generally be 300 DPI at their final printed size. Vector logos are preferred where available.
Can artwork run across a fold?▾
Yes, backgrounds and intentional graphic elements can cross folds. Small text, fine detail and important branding should generally be kept away from crease lines.
Can Pakko match a Pantone colour?▾
Available colour-matching options depend on the material and printing method. Digital CMYK may provide a close interpretation but cannot reproduce every Pantone colour exactly.
Do I need to outline fonts?▾
Fonts should generally be converted to outlines in the final artwork file or embedded and supplied with the artwork. Keep an editable master file before outlining.
Can Pakko check my artwork?▾
Pakko reviews artwork for common production issues such as bleed, resolution, keyline placement and file setup. The customer remains responsible for content, regulatory compliance and final proof approval.
Should I order a sample before production?▾
A plain sample is recommended when you need to test size, structure, assembly or product fit. A printed prototype may be considered when colour and artwork placement are important.
Create packaging that is ready for production
Good packaging begins with the right structure and correctly prepared artwork. Pakko works with Australian businesses, designers, agencies and trade partners to develop custom cardboard packaging that can be designed, printed, die-cut and manufactured at our Brisbane factory.
Send us your product details, packaging dimensions, artwork concept and required quantity. Our team will help you determine the next step.